Illuminating Beauty: Mastering Jewellery Photography At Home
Illuminating Beauty: Mastering Jewellery Photography at Home
Related Articles: Illuminating Beauty: Mastering Jewellery Photography at Home
Introduction
With enthusiasm, let’s navigate through the intriguing topic related to Illuminating Beauty: Mastering Jewellery Photography at Home. Let’s weave interesting information and offer fresh perspectives to the readers.
Table of Content
Illuminating Beauty: Mastering Jewellery Photography at Home
In the realm of e-commerce and online marketplaces, captivating visuals are paramount. For those venturing into the world of jewellery sales, high-quality product photography is a non-negotiable element for success. While professional studios offer exceptional results, the ability to create compelling images at home opens up a world of possibilities for aspiring entrepreneurs and hobbyists alike. This article delves into the art of jewellery photography at home, equipping readers with the knowledge and techniques to capture the brilliance and intricacies of their creations.
The Importance of Jewellery Photography at Home
Beyond the aesthetic appeal, jewellery photography plays a crucial role in enhancing the online shopping experience. Well-executed images:
- Attract attention and generate interest: A visually appealing photograph instantly draws the eye, making it more likely for potential customers to click and explore the product further.
- Showcase details and craftsmanship: High-resolution images highlight the intricate details, textures, and quality of the jewellery, fostering trust and credibility.
- Convey the true essence of the piece: Photography can effectively capture the sparkle, shine, and overall aesthetic of jewellery, allowing customers to visualize how it would look in real life.
- Reduce return rates: Detailed and accurate images minimize the chance of customers receiving a product that doesn’t meet their expectations, leading to fewer returns.
- Increase sales and conversions: Ultimately, compelling visuals translate into increased engagement, higher click-through rates, and ultimately, more sales.
Essential Equipment for Jewellery Photography at Home
While professional photographers utilize specialized equipment, achieving impressive results at home is achievable with a few key items:
- Camera: A DSLR or mirrorless camera offers greater control over settings and image quality compared to smartphones. However, even a high-quality smartphone camera can capture excellent results with proper technique.
- Lens: A macro lens is ideal for capturing intricate details, but a standard 50mm lens can also be effective. Experiment with different focal lengths to find what suits your needs.
- Tripod: A sturdy tripod ensures stability, minimizing camera shake and resulting in sharp images.
- Lighting: Natural light is often preferred for jewellery photography, but artificial light sources like LED panels or softboxes provide greater control.
- Reflector: A white or silver reflector bounces light back onto the subject, creating a more balanced and even illumination.
- White or Grey Background: A simple white or grey background provides a clean and minimalist backdrop, allowing the jewellery to take center stage.
- Props: For creative shots, consider incorporating props like fabrics, flowers, or other objects to enhance the visual appeal and tell a story.
- Editing Software: Basic editing software like Adobe Lightroom or GIMP can be used to adjust brightness, contrast, and color balance, enhancing the final image.
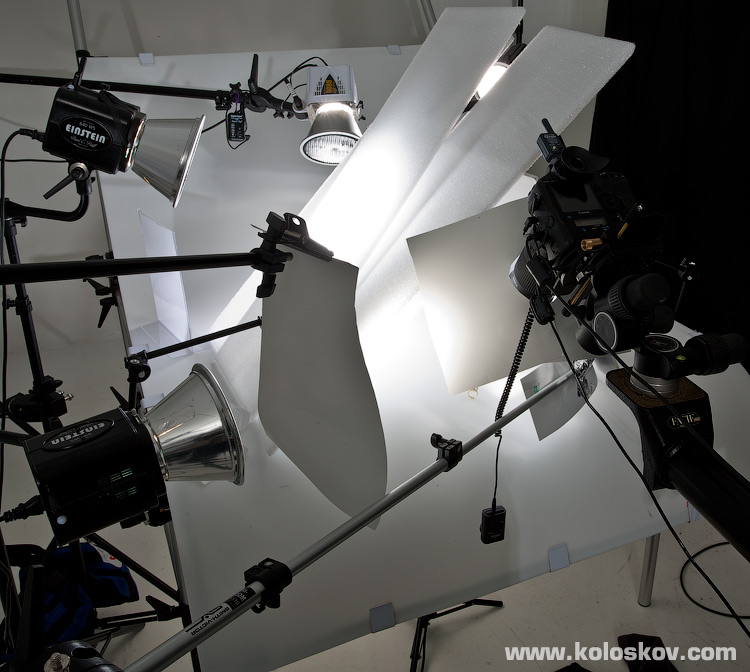
Lighting Techniques for Jewellery Photography at Home
Mastering lighting is essential for capturing the brilliance and sparkle of jewellery. Here are some effective techniques:
- Natural Light: Soft, diffused natural light is ideal for showcasing the beauty of jewellery. Position your setup near a window, avoiding direct sunlight which can create harsh shadows.
- Artificial Light: When natural light is unavailable, utilize artificial light sources like LED panels or softboxes. Experiment with different light angles and positions to find the most flattering illumination for your jewellery.
- Reflector Placement: Strategic placement of a reflector can bounce light back onto the subject, filling in shadows and creating a more balanced and even illumination.
- Lightbox: A DIY lightbox using a cardboard box and LED strips can provide a consistent and controlled lighting environment for your jewellery.
Jewellery Photography Ideas at Home: Unleashing Creativity
Beyond technical aspects, creativity is key to making your jewellery photography stand out. Here are some inspiring ideas:
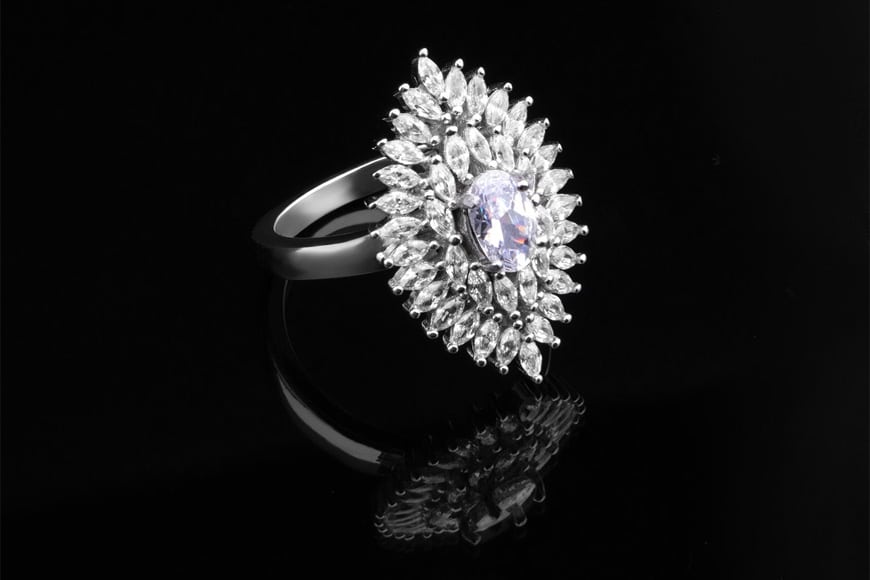
- Classic Product Shots: Focus on showcasing the jewellery in its simplest form, using a clean background and minimal props. This approach emphasizes the design and craftsmanship of the piece.
- Lifestyle Shots: Create a scene that portrays the jewellery being worn or used in a natural setting. This helps potential customers visualize how the piece would look in everyday life.
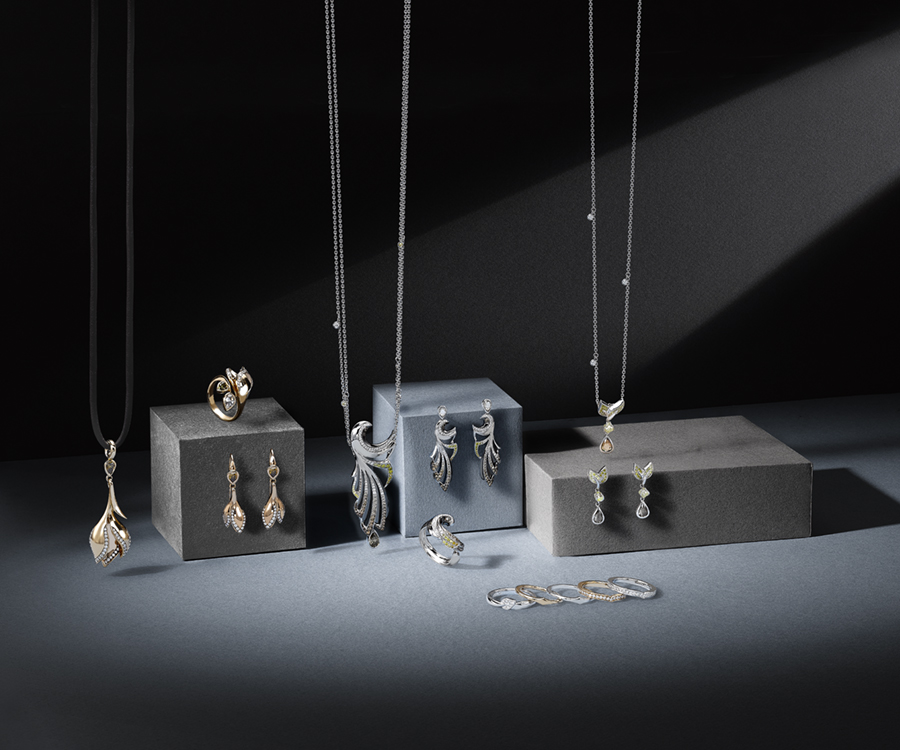
- Flat Lay Photography: Arrange the jewellery alongside complementary props on a flat surface, creating a visually appealing composition. This technique is particularly effective for showcasing multiple pieces or creating a cohesive brand aesthetic.
- Close-up Shots: Highlight the intricate details of the jewellery by capturing close-up images. Use a macro lens or zoom in with your camera to reveal the textures, patterns, and craftsmanship.
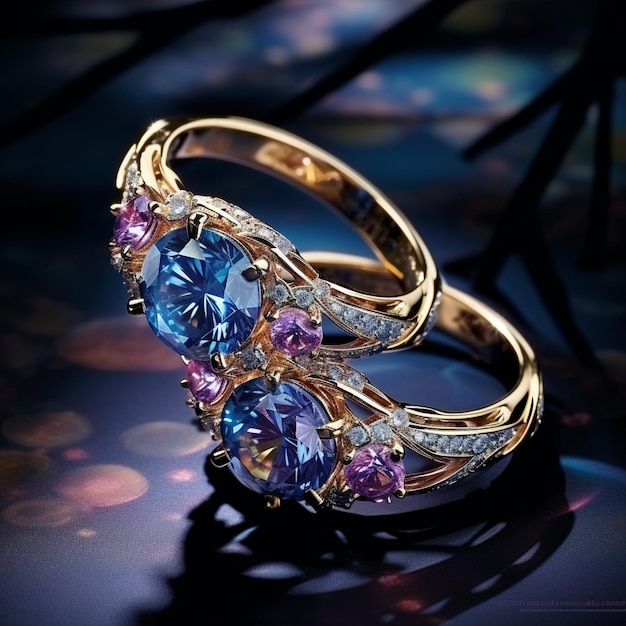
- Creative Storytelling: Use photography to tell a story about the jewellery, its inspiration, or the craftsmanship behind it. This can involve incorporating elements that reflect the brand’s personality or the piece’s history.
Tips for Stunning Jewellery Photography at Home
- Clean Your Jewellery: Before photographing, ensure the jewellery is clean and free of any dust, fingerprints, or scratches. This will prevent distractions in your images.
- Use a White or Grey Background: A simple white or grey background provides a clean and minimalist backdrop, allowing the jewellery to take center stage.
- Experiment with Angles: Try different angles to find the most flattering perspective for your jewellery. Experiment with overhead shots, side views, and close-ups.
- Focus on Sharpness: Ensure your images are in focus to showcase the details of the jewellery. Use a tripod and a remote shutter release to minimize camera shake.
- Adjust White Balance: Correct white balance ensures that the colors in your images are accurate. Adjust the white balance setting on your camera or in editing software.
- Edit Your Images: Use basic editing software to adjust brightness, contrast, and color balance, enhancing the final image.
- Use a Water Droplet Technique: For a unique and eye-catching effect, place a drop of water on the jewellery and capture the way it reflects light.
- Incorporate Textures: Add interest to your images by using textured surfaces like fabrics, wood, or stone as backdrops.
- Embrace Negative Space: Don’t be afraid to leave some negative space around the jewellery in your images. This can create a sense of balance and allow the piece to breathe.
- Showcase the Jewelry in Context: Photograph the jewellery being worn or used in a natural setting. This will help potential customers visualize how the piece would look in everyday life.
FAQs on Jewellery Photography at Home
Q: What is the best camera for jewellery photography at home?
A: A DSLR or mirrorless camera with a macro lens is ideal for capturing intricate details. However, even a high-quality smartphone camera can produce excellent results with proper technique.
Q: What type of lighting is best for jewellery photography?
A: Soft, diffused natural light is preferred, but artificial light sources like LED panels or softboxes provide greater control.
Q: How do I create a professional-looking background for my jewellery photography?
A: A simple white or grey backdrop provides a clean and minimalist background. You can also use a DIY lightbox or a piece of white fabric.
Q: What are some tips for editing jewellery photos?
A: Adjust brightness, contrast, and color balance to enhance the final image. You can also use editing software to remove any blemishes or imperfections.
Q: How can I make my jewellery photography stand out?
A: Experiment with different angles, props, and lighting techniques to find what works best for your jewellery. Be creative and have fun!
Conclusion
Mastering jewellery photography at home is an achievable goal that can significantly enhance your online presence and sales. With the right equipment, lighting techniques, and creative approaches, you can capture the brilliance and beauty of your creations, captivating potential customers and building a successful online business. By applying the knowledge and tips outlined in this article, you can unlock the power of visual storytelling, transforming your jewellery into captivating works of art that resonate with your audience.


Closure
Thus, we hope this article has provided valuable insights into Illuminating Beauty: Mastering Jewellery Photography at Home. We appreciate your attention to our article. See you in our next article!