Capturing Sparkle: A Guide To Stunning Jewellery Photoshoots At Home
Capturing Sparkle: A Guide to Stunning Jewellery Photoshoots at Home
Related Articles: Capturing Sparkle: A Guide to Stunning Jewellery Photoshoots at Home
Introduction
With enthusiasm, let’s navigate through the intriguing topic related to Capturing Sparkle: A Guide to Stunning Jewellery Photoshoots at Home. Let’s weave interesting information and offer fresh perspectives to the readers.
Table of Content
Capturing Sparkle: A Guide to Stunning Jewellery Photoshoots at Home

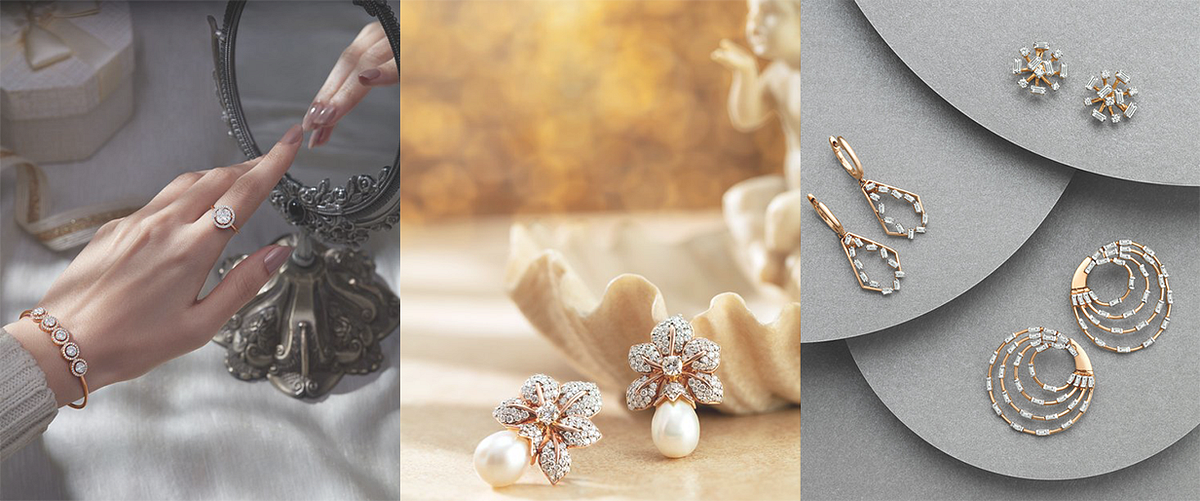
In the realm of online commerce, captivating visuals are paramount. For jewellery businesses, this translates to high-quality photographs that showcase the intricate details and brilliance of each piece. While professional studio setups are ideal, achieving stunning results from the comfort of your own home is entirely achievable. This comprehensive guide delves into the art of creating captivating jewellery photoshoots at home, equipping you with the knowledge and techniques to elevate your brand’s visual appeal.
The Importance of High-Quality Jewellery Photography
In the competitive online marketplace, captivating imagery plays a crucial role in attracting customers and driving sales. High-quality jewellery photographs:
- Enhance Visual Appeal: Detailed images showcase the craftsmanship, sparkle, and unique features of each piece, enticing potential buyers.
- Build Trust and Credibility: Professional-looking photographs instill confidence in the quality and authenticity of your products.
- Boost Conversion Rates: Compelling visuals inspire customers to click, browse, and ultimately purchase.
- Elevate Brand Identity: Consistent and high-quality photography reinforces your brand’s aesthetic and resonates with your target audience.
- Promote Social Media Engagement: Shareable images on social media platforms increase brand visibility and drive traffic to your website.
Crafting the Perfect Home Studio Setup
Creating a dedicated space for your jewellery photography is essential. Here’s a step-by-step guide to establishing your home studio:
1. Choosing the Right Location:
- Natural Light: Opt for a room with ample natural light, ideally near a window.
- Minimal Distractions: Select a clutter-free area with a plain background.
- Stability: Ensure the chosen space offers a stable surface for your camera and props.
2. Setting Up Your Lighting:
- Natural Light: Utilize soft, diffused natural light by positioning your subject near a window. Avoid harsh direct sunlight.
- Artificial Light: If natural light is insufficient, invest in a softbox or ring light for controlled illumination.
- Reflectors: Employ reflectors to bounce light back onto your subject, creating even illumination and reducing shadows.
3. Crafting the Background:
- Simplicity is Key: Opt for a plain, neutral backdrop like white, grey, or black.
- Texture: Add subtle texture to your background using fabrics like velvet or linen.
- DIY Options: Create a backdrop using a large sheet of paper or a smooth wall painted in a neutral color.
4. Selecting the Right Props:
- Complement the Jewellery: Choose props that complement the style and theme of your pieces.
- Storytelling: Use props to create a narrative around your jewellery, highlighting its intended use or inspiration.
- Minimalism: Keep props minimal and avoid overwhelming the subject.
5. Essential Equipment for Jewellery Photography:
- Camera: A DSLR or mirrorless camera offers superior image quality and control.
- Macro Lens: A macro lens is essential for capturing intricate details and achieving sharp focus.
- Tripod: A sturdy tripod ensures sharp images by eliminating camera shake.
- Remote Shutter Release: A remote shutter release allows for hands-free shooting, minimizing camera movement.
- Editing Software: Photo editing software like Adobe Photoshop or Lightroom is crucial for enhancing images and achieving professional results.
Mastering the Art of Jewellery Photography
With your home studio set up, it’s time to delve into the technical aspects of capturing stunning images:
1. Composition and Framing:
- Rule of Thirds: Divide your image into nine equal sections and position your subject at the intersection points for visual balance.
- Leading Lines: Utilize natural lines in your composition to guide the viewer’s eye towards the jewellery.
- Negative Space: Surround your subject with empty space to create a sense of elegance and draw attention to the piece.
- Symmetry: Experiment with symmetrical arrangements for a balanced and harmonious composition.
2. Focus and Depth of Field:
- Sharp Focus: Ensure the jewellery is in sharp focus, while the background is slightly blurred.
- Depth of Field: Adjust your aperture to control the depth of field, creating a shallow depth of field for a blurred background that isolates the jewellery.
3. Lighting Techniques:
- Natural Light: Utilize soft, diffused natural light for a natural and flattering effect.
- Artificial Light: Experiment with different light sources, including softboxes, ring lights, and LED panels, to achieve desired effects.
- Backlighting: Position your light source behind the jewellery for a dramatic and ethereal effect.
- Side Lighting: Use side lighting to highlight the texture and contours of the jewellery.
4. Styling and Presenting Your Jewellery:
- Showcase the Details: Capture close-up shots that reveal the intricate details of the piece.
- Multiple Angles: Photograph your jewellery from various angles to showcase its beauty from all sides.
- Real-Life Context: Style your jewellery on models or mannequins to demonstrate how it looks when worn.
- Group Shots: Create captivating group shots to showcase a collection or highlight complementary pieces.
5. Editing and Post-Processing:
- Enhancement, Not Alteration: Use editing software to enhance the image, not to alter the original appearance of the jewellery.
- Brightness and Contrast: Adjust brightness and contrast to optimize the image’s clarity and vibrancy.
- Color Correction: Fine-tune the colors to ensure accurate representation of the jewellery.
- Cropping and Resizing: Crop and resize images to meet your desired specifications.
- Sharpening: Enhance sharpness to accentuate the details of the jewellery.
Frequently Asked Questions (FAQs) on Jewellery Photoshoots at Home:
Q: What type of camera is best for jewellery photography?
A: A DSLR or mirrorless camera with a macro lens is ideal for capturing intricate details and achieving professional-looking results.
Q: How do I achieve a blurred background in my jewellery photos?
A: Use a wide aperture setting (low f-stop number) to create a shallow depth of field, blurring the background and isolating the jewellery.
Q: What are the best lighting options for jewellery photography at home?
A: Soft, diffused natural light is ideal. If natural light is insufficient, consider using a softbox or ring light.
Q: How do I style my jewellery for photoshoots?
A: Choose props that complement the style and theme of your pieces. Use models or mannequins to showcase the jewellery in context.
Q: What are some editing tips for jewellery photos?
A: Enhance the image by adjusting brightness, contrast, color, and sharpness. Crop and resize images as needed. Avoid altering the original appearance of the jewellery.
Tips for Creating Captivating Jewellery Photoshoots at Home:
- Experiment with Different Angles and Perspectives: Try photographing from above, below, and from different sides to capture unique and dynamic perspectives.
- Incorporate Movement: Use props or models to create a sense of movement and dynamism in your images.
- Play with Reflections: Use mirrors or reflective surfaces to create interesting reflections and add depth to your photos.
- Tell a Story: Use props and styling to create a narrative around your jewellery, highlighting its intended use or inspiration.
- Seek Inspiration: Browse online galleries and magazines for inspiration and ideas.
- Practice, Practice, Practice: The more you practice, the better you will become at capturing stunning jewellery photographs.
Conclusion: Empowering Your Brand Through Visual Storytelling
Mastering the art of jewellery photography at home empowers you to create captivating visuals that showcase your brand’s unique identity and elevate your online presence. By implementing the techniques and strategies outlined in this guide, you can capture stunning photographs that inspire customers, build trust, and drive sales. Remember, high-quality visuals are not just a necessity but a powerful tool for storytelling and engaging your audience in the captivating world of jewellery.


Closure
Thus, we hope this article has provided valuable insights into Capturing Sparkle: A Guide to Stunning Jewellery Photoshoots at Home. We thank you for taking the time to read this article. See you in our next article!